
Wish to simply get began? Construct an ecommerce web site with Hostinger and WooCommerce for simply $3.99 monthly.
Each profitable on-line enterprise begins and ends with an awesome web site. If you happen to haven’t made one earlier than, don’t let that cease you. In spite of everything, your first sale isn’t going to occur by itself—and on-line purchasing is commonplace and customary for many product classes.
Moving into the ecommerce trade now’s your likelihood to win a share of the rising earnings. The earlier you begin, the earlier you possibly can set up your model and get the phrase out.
With the instruments out there in the marketplace right now, constructing your ecommerce web site is less complicated and extra intuitive than ever.
The preferred ecommerce web site builder on the earth is WooCommerce. It’s free to make use of, however it requires webhosting and a WordPress web site.
We’ll present you how one can get the very best deal on webhosting, set up WordPress in a single click on, and launch your very personal WooCommerce web site right now.
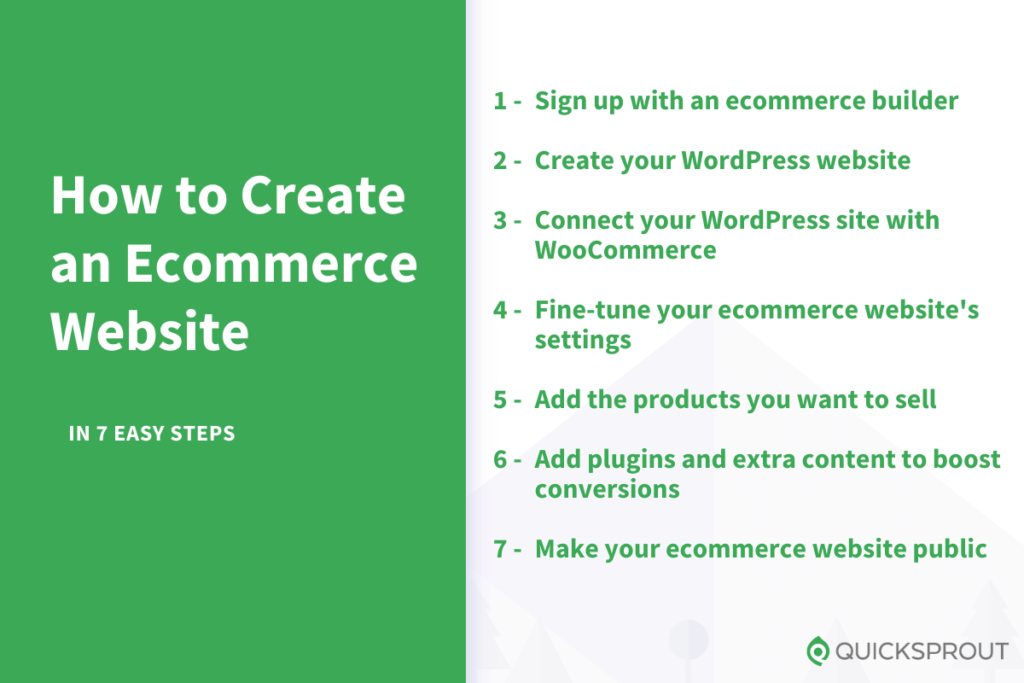
7 Steps to Create an Ecommerce Web site
Creating an ecommerce web site is straightforward. Simply observe the step-by-step directions under:
- Join with an ecommerce builder
- Create your WordPress web site
- Join your WordPress web site with WooCommerce
- Tremendous-tune your ecommerce web site’s settings
- Add the merchandise you need to promote
- Add plugins and further content material to spice up conversions
- Make your ecommerce web site public
The Straightforward Components of Creating an Ecommerce Web site
There are such a lot of alternatives to thrive and succeed on the earth of ecommerce. Customers globally have already embraced the comfort of on-line purchasing, and it’s develop into the brand new regular for many individuals.
Which means there’s already an unlimited buyer base that’s keen to purchase your stuff.
You may even promote your merchandise to worldwide customers in the event you accomplice with the proper couriers and success options. There are not any just about no geographical obstacles while you’re promoting on-line.
It’s even potential to promote merchandise by your ecommerce retailer with out ever touching the stock. If you happen to begin a dropshipping enterprise, all it’s a must to do is handle the web site and your suppliers can ship merchandise on to your clients.
Simply give attention to making a web site that’s well-optimized for customers. If you happen to promote high-quality merchandise and supply wonderful customer support, every little thing else will care for itself.
Low Prices for Creating Your Ecommerce Web site
Due to the entire nice web site builders in the marketplace, making an ecommerce web site has by no means been simpler. Platforms like Hostinger, WordPress, Wix, and Squarespace are only a handful of choices to simplify this course of.
Getting began right here is as straightforward as creating an account and choosing a plan.
Better of all, these plans are very inexpensive. You may have a brand new ecommerce web site up and operating inside a number of hours for as little as $3.99 monthly utilizing WordPress + Hostinger. You may all the time improve to a extra highly effective subscription or tier as what you are promoting grows over time.
Creating Your Ecommerce Web site
With Hostinger and WooCommerce, you will get began in just some clicks. Simply set up WordPress and add the WooCommerce plugin. This allows you to create an internet retailer with out having to rent an internet designer or code something by yourself.
WooCommerce allows you to add ecommerce performance to any WordPress web site. It’s the simplest solution to promote on-line if you wish to energy your web site with WordPress.
Personalizing Your Ecommerce Web site
Utilizing WordPress additionally means you’ll have entry to 1000’s of themes that may enable you to construct the proper WordPress web site. You may tailor every little thing particularly to your individual distinctive wants and accommodate the tastes of your potential clients.
Even in the event you’re not utilizing WordPress, you possibly can nonetheless get began by selecting an ecommerce-specific theme on no matter platform you’re utilizing.
You’ll nonetheless have complete management over how your web site seems and feels. However utilizing a theme or template is way simpler than ranging from a clean display screen.
The Onerous Components of Creating an Ecommerce Web site
Creating and launching your ecommerce web site is straightforward. However success within the ecommerce area may be difficult.
In case your web site takes too lengthy to load or has low-quality product photos, you’ll lose out on gross sales alternatives. Your ecommerce web site also needs to be mobile-friendly and have seamless navigation.
You additionally want to think about how reliable your web site is to new guests. Some individuals is likely to be hesitant to purchase in the event you’re a brand new firm and so they’ve by no means heard of you.
Establishing belief requires third-party proof that your web site is safe by issues like SSL certificates and safety authentication belief marks. Folks gained’t provide you with their bank card particulars or private info in the event that they assume your web site is untrustworthy.
Cost processing and delivery logistics are different widespread ecommerce challenges. Past delivery, coping with returns may also be a logistical nightmare in the event you’re not planning forward.
In keeping with Forbes, the typical ecommerce return charge is 16%. That’s not all—a whopping 58% of customers within the US purchase merchandise on-line with the intent to return.
Briefly, in the event you’re not taking returns into consideration while you’re establishing your costs and calculating margins, you possibly can be coping with some losses.
Each client has a distinct cost choice. So in case your web site doesn’t supply their favourite strategies, they might find yourself abandoning the acquisition. For instance, in case your on-line retailer solely accepts funds through PayPal and your buyer desires to pay utilizing a bank card, they might not purchase your product.
Ecommerce shops usually depend on third events for delivery, which creates a number of room for error. Whereas delivery issues and broken items could also be out of your management, it’s nonetheless a poor reflection of your model within the eyes of the shopper.
Offering wonderful customer support is a should, which may be difficult while you’re first getting began. You’ll want to answer buyer questions and inquiries ASAP, which probably means you’ll must get a devoted customer support software program.
As soon as your retailer goes reside, you’ll nonetheless must market your merchandise and search for distinctive methods to distinguish your self from the competitors. This usually requires some paid advertisements, and there’s no assure you’ll begin getting gross sales straight away.
Step 1: Signal Up With an Ecommerce Builder
Earlier than you possibly can have an ecommerce web site, you’ll want an ecommerce account.
This can be a essential step, the place you make tons of vital selections. You must select a dependable web site builder, resolve on a website identify, and create your account.
A standard mistake that many ecommerce sellers make is dashing by these seemingly insignificant selections. Don’t be one in all them.
Take your time, weigh the professionals and cons, after which make the ultimate cost.
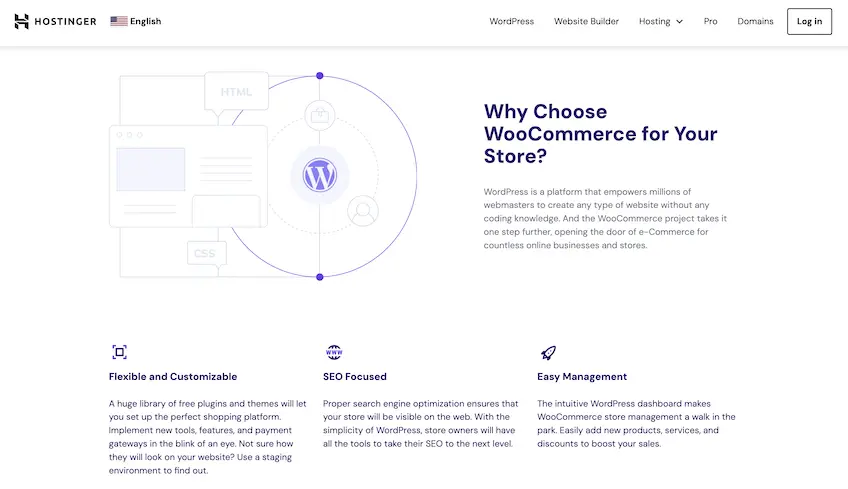
We extremely advocate utilizing WooCommerce internet hosting from Hostinger. WooCommerce is a WordPress plugin that means that you can create an internet retailer.
It’s a tad costlier than their WordPress internet hosting, however it comes with every little thing you should construct an internet retailer.
It’s absolutely customizable and safe, offers you a free SSL certificates and area identify, AND offers you entry to wonderful WooCommerce instruments that can assist you construct, promote, and begin promoting from a safe on-line retailer!
Let’s bounce in.
Head Over to Hostinger’s Web site
First, you want an account with Hostinger. You’ll arrange your WordPress account through the signup course of for Hostinger’s WooCommerce internet hosting web page.
Tip: Comply with the hyperlink above. You may go to Hostinger homepage, however we haven’t all the time seen the WooCommerce internet hosting possibility out there within the drop-down menu.
When you’re there, you’ll see the completely different pricing plans they’ve out there.
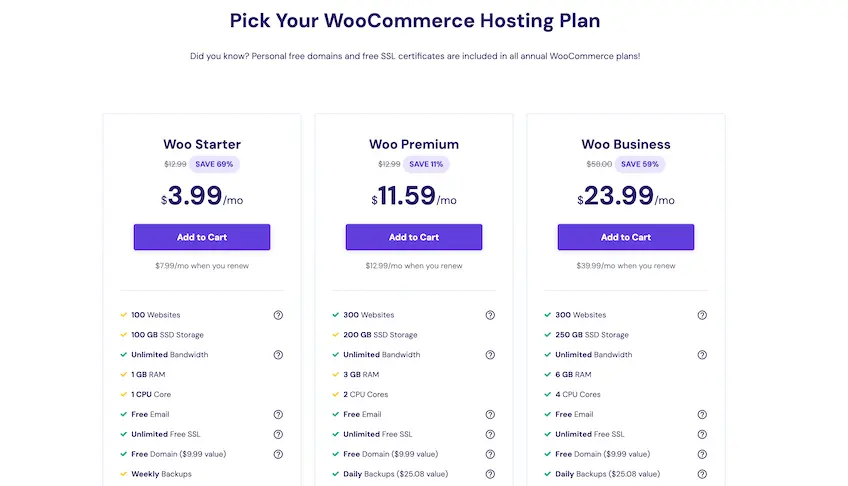
By way of options, the Woo Starter plan ought to be superb for many novices. It’s an incredible value, and has the entire fundamentals you should succeed.
If you would like a WordPress staging software, devoted IP, and object cache for WordPress, you’ll must improve to Woo Premium.
Woo Premium and Woo Enterprise are just about similar by way of options. The one distinction is you’re getting extra storage, RAM, and computing energy on the increased tier.
Maximize Your Low cost
After you have chosen a plan, you’ll be requested to pick out how lengthy you need to join. The longer you join, the better your low cost and decrease your eventual renewal value.
- $3.99 monthly for 48 months (renews at $7.99)
- $4.99 monthly for twenty-four months (renews at $8.99)
- $6.99 monthly for 12 months (renews at $9.99)
- $12.99 for month-to-month
On the finish of the day, the 48-month plan is the easiest way to maximise your low cost—which finally ends up saving you about $432 over 4 years in comparison with the opposite choices.
We advocate signing up for so long as potential. Sure, it’s a must to pay upfront, however the financial savings are vital over time. Lock within the low promotional charge for so long as you possibly can.
Step 2: Create Your WordPress Web site
Hostinger offers you a free area for one 12 months while you join any plan that’s 12 months or longer. So get this squared away after you’ve created your account.
Merely enter your required area identify, and Hostinger will let you realize if it’s out there. In any other case, you’ll have to decide on one thing else.
Get creative along with your area identify concepts. Brainstorm phrases and phrases that make sense along with your on-line retailer.
We advocate .com area extensions, however you might have extra luck with a distinct one, like .internet, or .biz.
For ecommerce, a number of the newer area extensions may work very properly, comparable to:
- .retailer
- .present
- .provide
- .store
Hostinger will robotically show different choices and area extensions if the one you need is just not out there.
Despite the fact that you aren’t paying to your area identify now, you’ll have to renew it subsequent 12 months. This isn’t a Hostinger factor, that is simply the way in which domains work.
Set up WordPress + WooCommerce
Putting in WordPress out of your Hostinger dashboard is straightforward. Merely log into your account, and choose Web sites from the menu on on the prime of the web page. Then click on Handle and scroll to the Auto Installer to proceed.
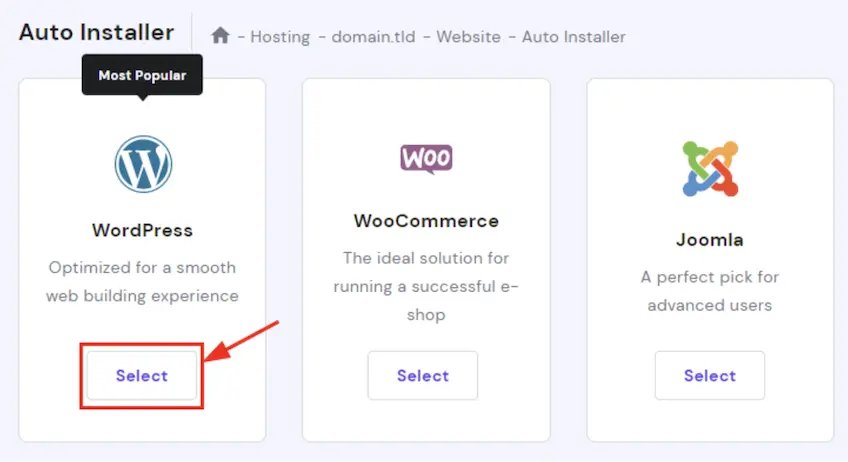
When you’ll see WooCommerce as an possibility right here too, you’ll nonetheless want to put in WordPress first. Bear in mind, WooCommerce is a WordPress plugin—so it could’t be put in or used till you have got WordPress arrange first.
You’ll be prompted to create a WordPress account. Write your username and password down, since you’ll want them once more shortly.
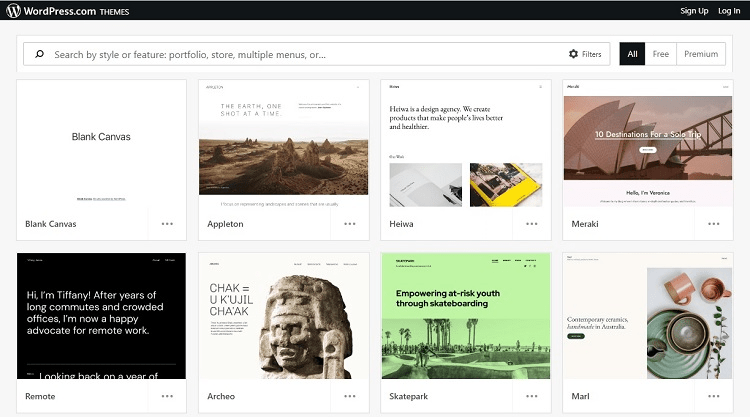
After that, you possibly can select from any of the free WooCommerce themes. These themes decide the essential structure of your on-line retailer, however in fact, you possibly can customise them to suit your model.
Over time, you’ll work with completely different themes to seek out out what you want. You may even spend cash on a paid theme down the road.
For now, you possibly can select a free theme that appears good, or simply skip this step and end establishing your web site. You may decide a brand new theme at any time.
On the backside of the web page, you’ll have the ability to evaluate all the small print. Double-check every little thing. Be sure the area identify is spelled proper and the e-mail account is appropriate.
In our expertise, it actually did take lower than three minutes for Hostinger to get every little thing pushed on-line.
Step 3: Join Your WordPress Web site With WooCommerce
As soon as your account is able to go, Hostinger takes you to a brand new display screen that helps you end establishing your web site. You’ll discover walkthroughs for activating your SSL certificates, launching WordPress, and putting in WooCommerce.
It is best to have the ability to log proper into your WordPress account with the credentials you created within the final step.
Set up WooCommerce Plugin
As soon as you’re within the WordPress dashboard, you’ll need to put in WooCommerce. Simply seek for WooCommerce within the plugins menu of your WordPress account, and click on Set up.
The setup couldn’t be simpler. Simply observe the prompts to proceed.
WooCommerce is among the hottest plugins for reworking a primary WordPress web site right into a full-fledged ecommerce retailer—and never with out cause.
It’s free, user-friendly, and an open-source platform. From product pages to implementing cost gateways to automated tax calculations, WooCommerce is a real lifesaver for ecommerce sellers.
Let’s stroll by getting the nuts and bolts of your new on-line retailer arrange.
Add Your Fundamental Data
Right here, you’ll end up getting into every kind of knowledge associated to your retailer, trade, product sort, and enterprise.
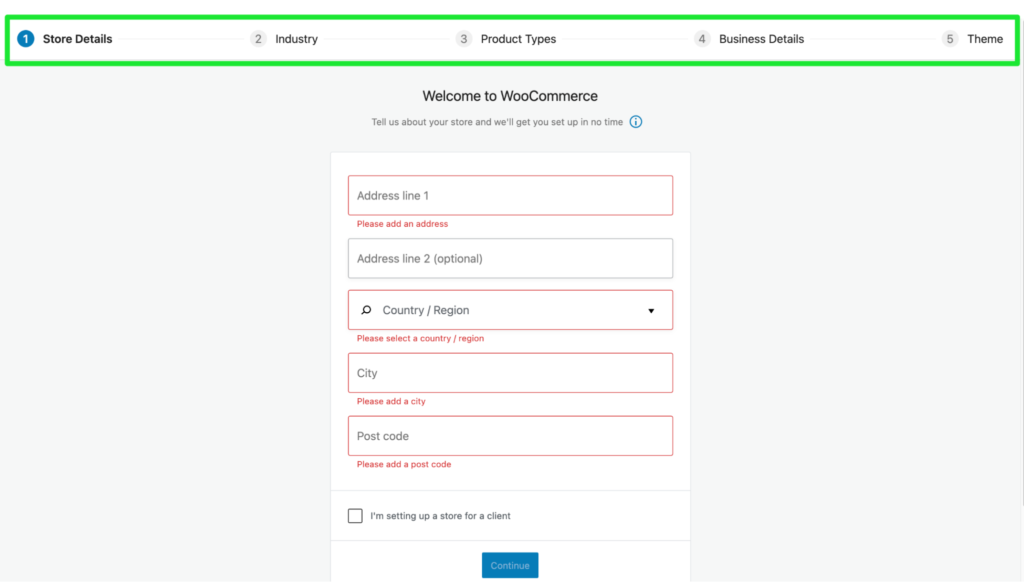
Out of your handle to the trade to the type of product you need to listing in your aspect, you’ll must reply all of them.
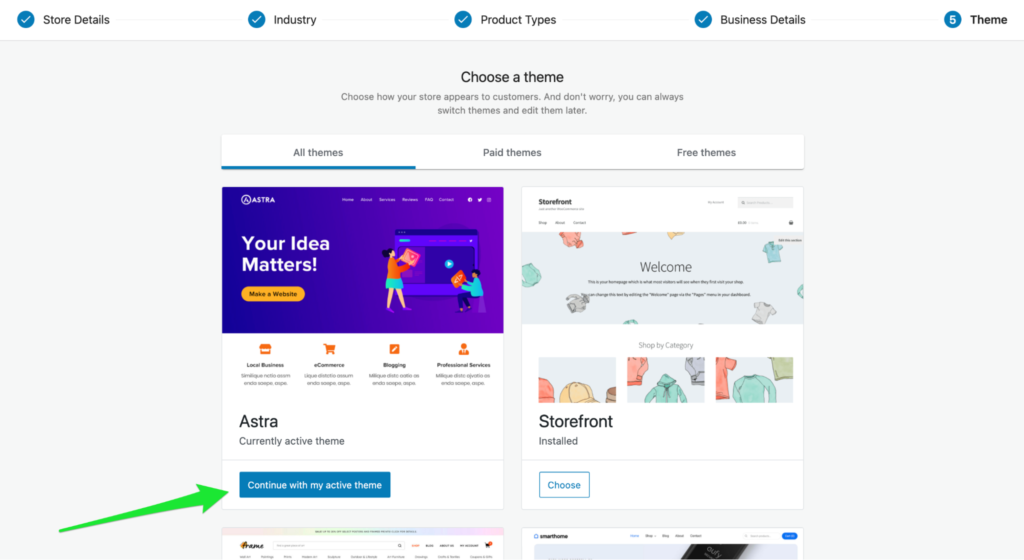
Select Your Ecommerce Web site Theme
At this level, you possibly can both proceed utilizing the theme you selected in Step 2, or you possibly can change your thoughts and proceed with one other one.
We need to proceed with Astra, so we’ll click on on Proceed with my lively theme.
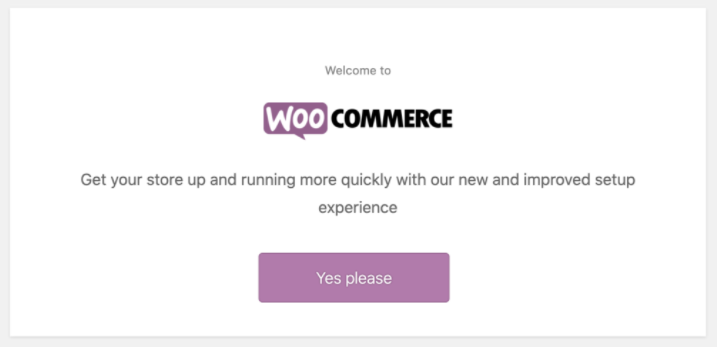
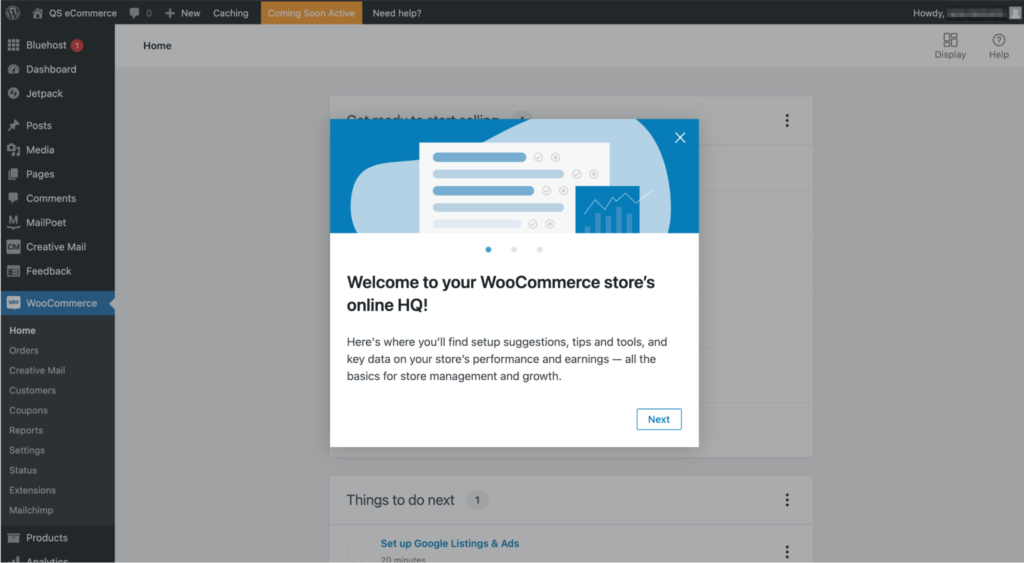
And that’s it! You’ll now see a popup welcoming you to your WooCommerce retailer’s on-line HQ.
Step 4: Tremendous-Tune Your Ecommerce Web site’s Settings
This step focuses on establishing the must-have components of an ecommerce web site, together with cost gateways, delivery choices, and computerized tax calculations.
Now, this may occasionally sound intimidating, however it actually isn’t. You solely want the proper steering, which is precisely what this information offers.
Set Up Cost Choices
Click on on Arrange funds underneath the Prepare to start out promoting part of your WooCommerce dashboard.

Choose the cost choices you need to settle for by your retailer: Stripe, Razorpay, PayU, or direct financial institution switch.
The setup course of could be very simple, and also you’ll have to attach your respective accounts along with your web site after clicking Arrange. Bear in mind, Stripe will help you take bank card funds.
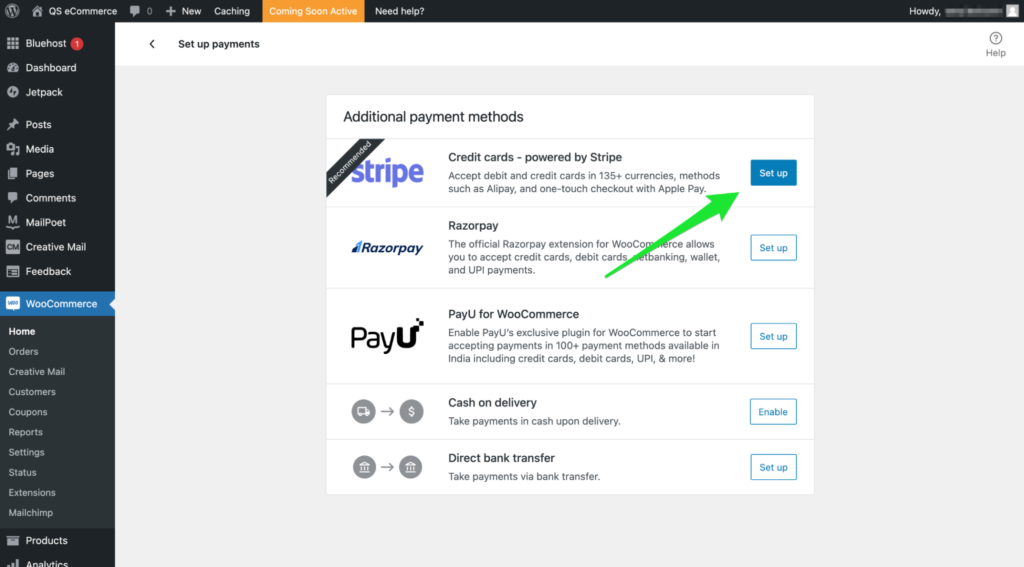
You may as well allow money on supply, however be sure you have the logistics in place. PayPal is another choice.
For extra info, take a look at our critiques of the finest cost strategies to your ecommerce web site.
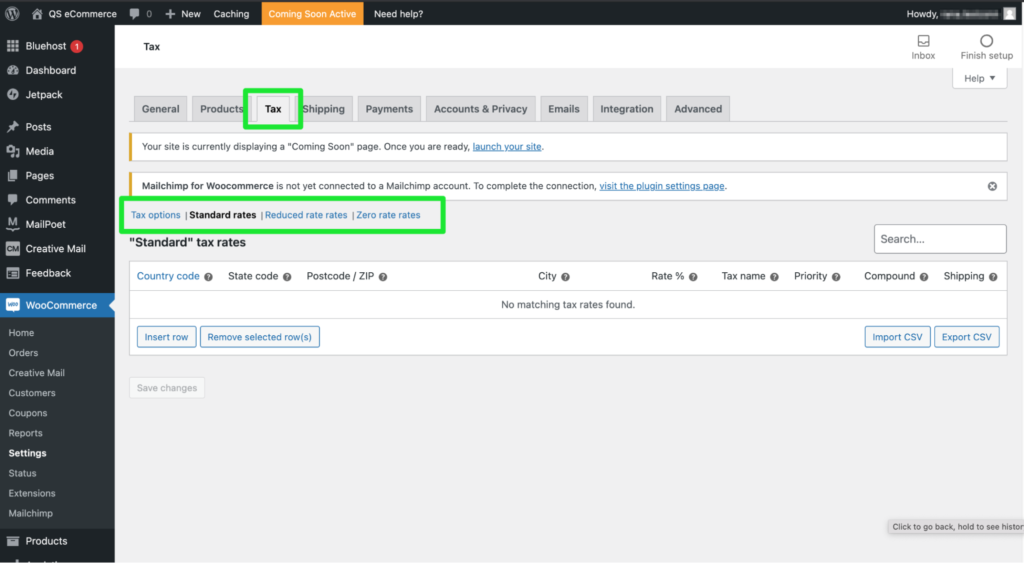
Configure Your Tax Charges
Clicking on Arrange tax from the WooCommerce dashboard allows you to configure your tax charges payable by your clients. Click on Configure.
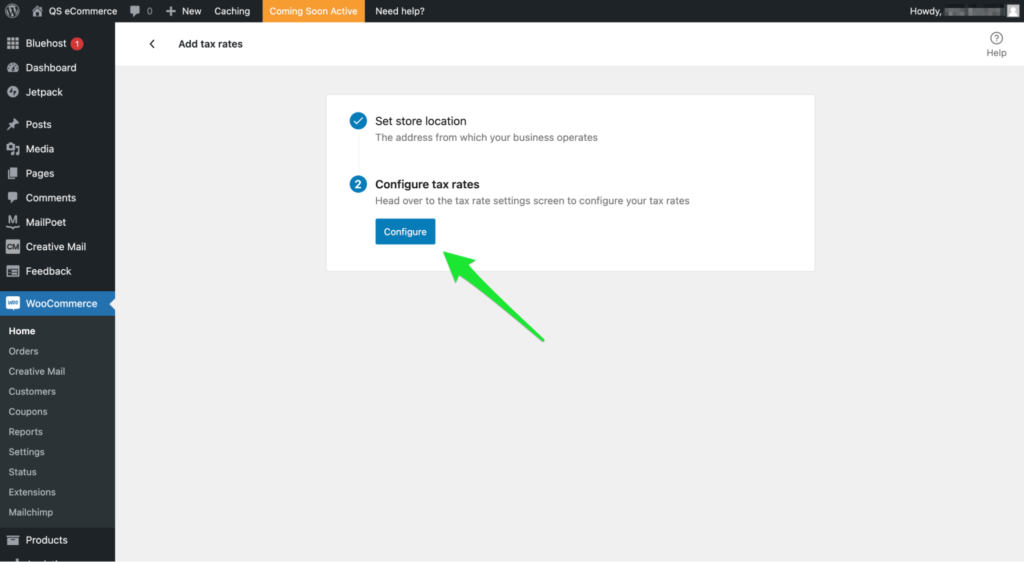
You’ll then be directed to the Tax tab, the place you possibly can configure your commonplace tax charges, amongst different tax choices.
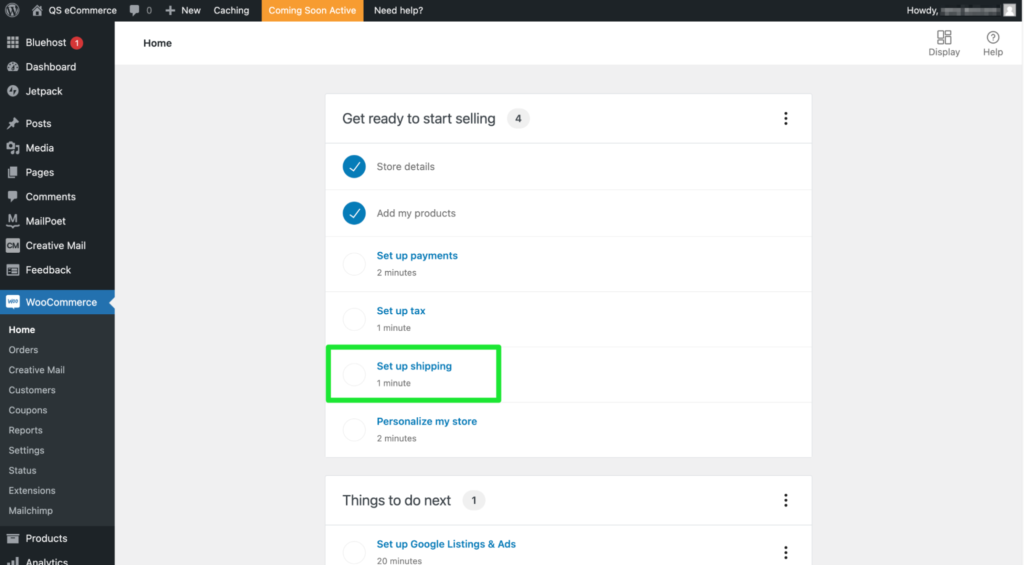
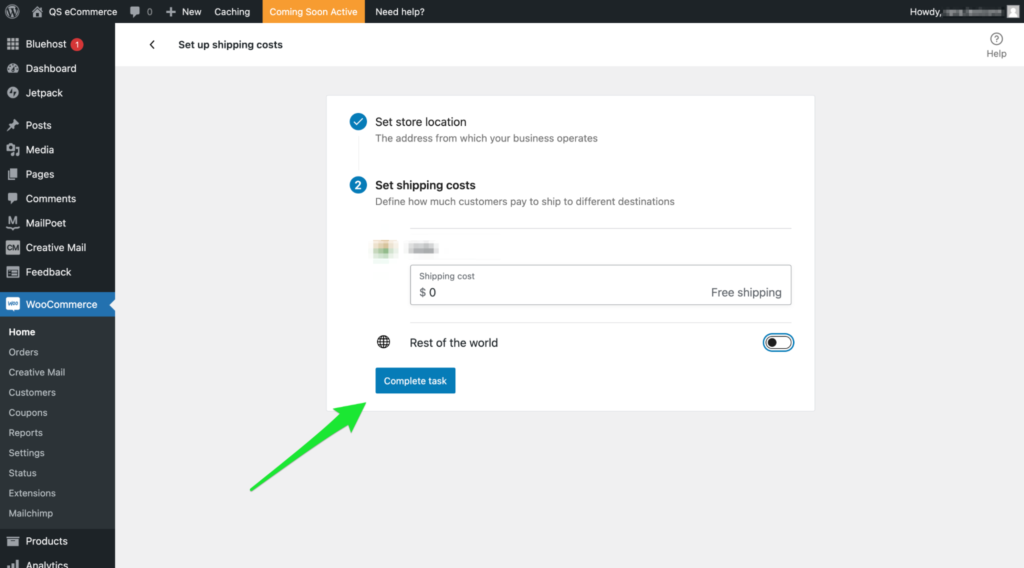
Set Up Delivery Choices
So as to add delivery choices, choose Arrange delivery from the listing of displayed choices in your WooCommerce dashboard.
Whereas WooCommerce will robotically acknowledge the world you’re in, you possibly can select your delivery charges. What’s extra, you possibly can both set a set value for each zone or set it as free.
As soon as finished, click on Full job.
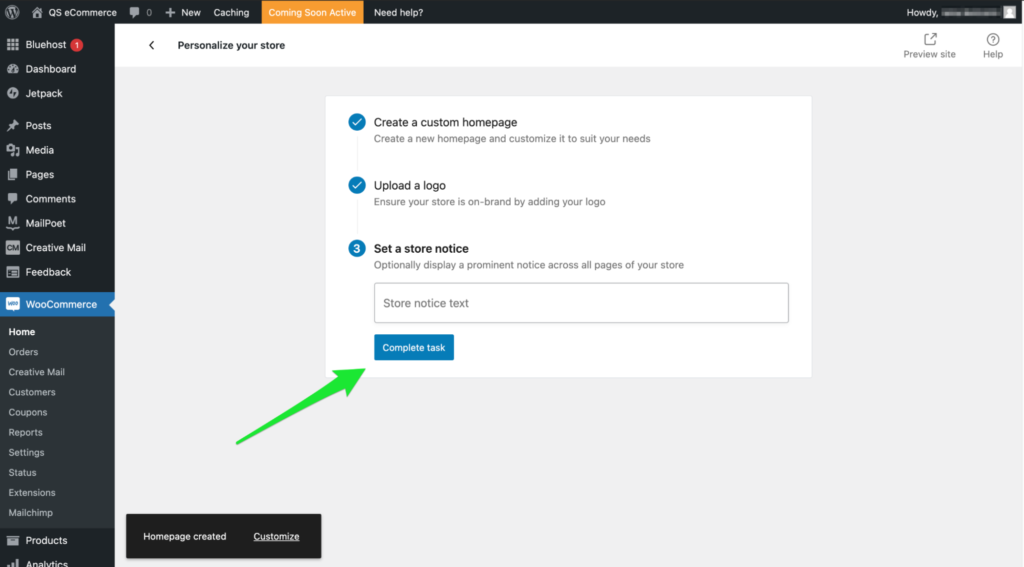
Personalize Your Ecommerce Web site
Stand aside out of your competitors by making a customized homepage, importing your organization brand, and including a retailer discover. Do that by clicking on Personalize my retailer on the WooCommerce dashboard.
WooCommerce means that you can customise every little thing that goes in your web site. So that you by no means have to fret about limiting your artistic aspect.
Click on Full job when you’re glad with how every little thing seems.
Step 5: Add the Merchandise You Wish to Promote
It is senseless to have an ecommerce web site in case you have nothing to promote. Exactly why the subsequent step is so as to add the merchandise you need to promote.
Choose Merchandise from the WordPress menu sidebar on the left, adopted by Add New.
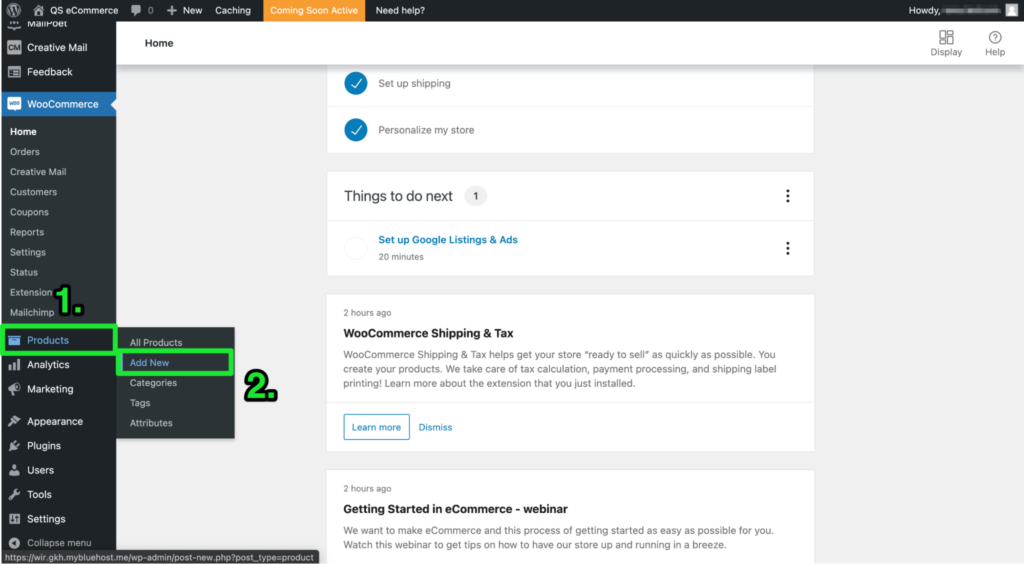
At this stage, you have got a clean canvas.
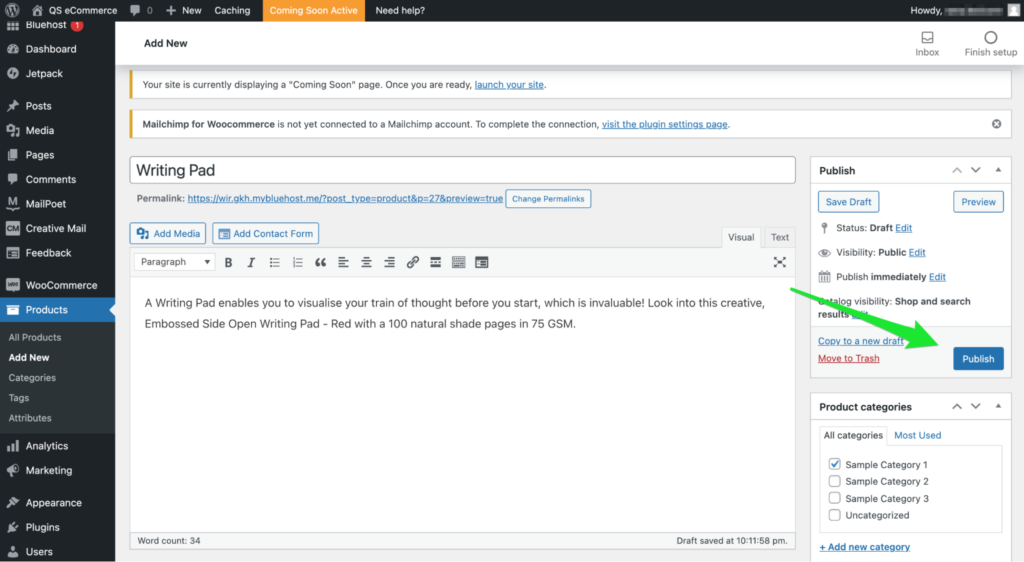
You’ll fill within the product’s identify, value, and outline and set the product class. You may as well add product photos, in addition to any further gallery photos.
Along with the above, you’ll additionally discover different tabs—Normal (the one you’re at the moment in), Stock (monitor your stock and add SKUs), Delivery (product dimensions and delivery prices), Linked Product (upselling complementary merchandise), and Attributes (measurement, coloration, and so on.)
For extra info on how the product classes and different attributes work, take a look at this detailed information from WooCommerce.
Click on on Publish when finished.
If you happen to click on on All Merchandise from the Merchandise aspect menu bar, you’ll discover your product listing together with the earlier examples.

Right here’s a fast guidelines to make sure you’re including the merchandise appropriately earlier than hitting Publish.
- Write the product title.
- Enter the lengthy product description and brief description for the product you need to add. Attempt to incorporate Web optimization phrases to rank increased within the SERPs.
- Add product photos.
- Add your product to your WordPress dashboard.
- Set up every product by class to maintain every little thing organized.
Step 6: Add Plugins and Further Content material to Enhance Conversions
You’ve finished every little thing at this level to create a brand new ecommerce web site. Subsequent, we focus on techniques that may enable you to carry extra visitors to your web site and, in flip, earn extra income.
Set up Plugins
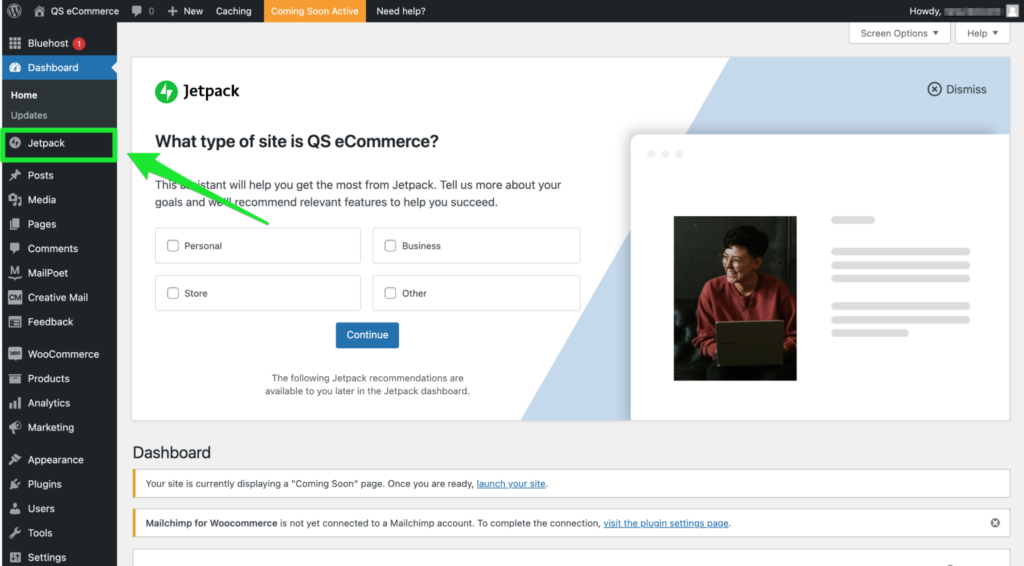
You could have already observed the Jetpack tab on the WordPress menu bar.
You may activate this plugin, together with a number of different plugins like Yoast Web optimization, Securi, and Web site Evaluations—all of which can work excellently to activate cost setups and automate taxes, implement Web optimization finest practices, improve safety, and add social proof, respectively.
Try our information of the finest WordPress plugins for extra suggestions.
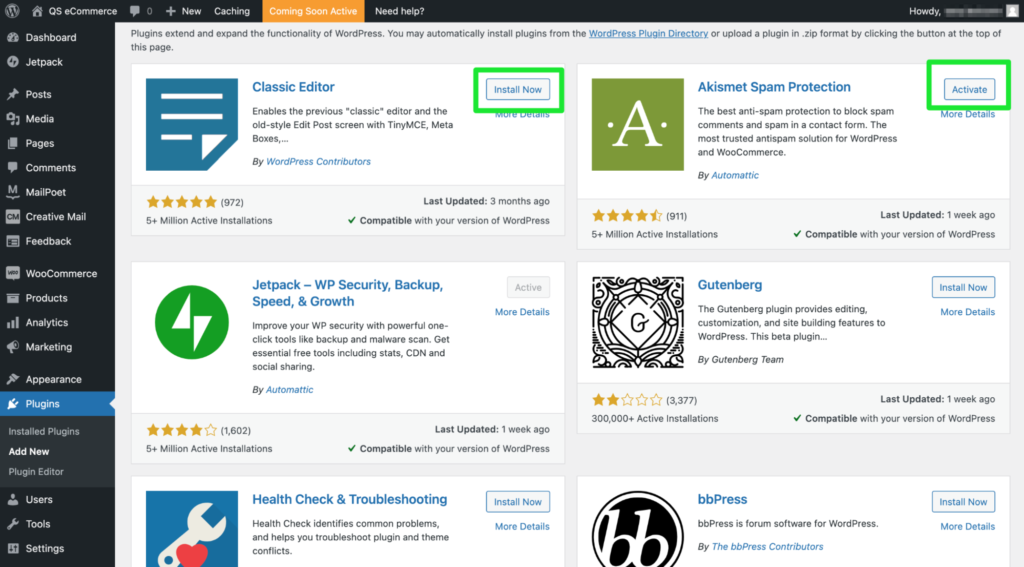
Right here’s how one can set up and activate plugins:
- Click on on Plugins from the aspect menu bar, adopted by Add New.
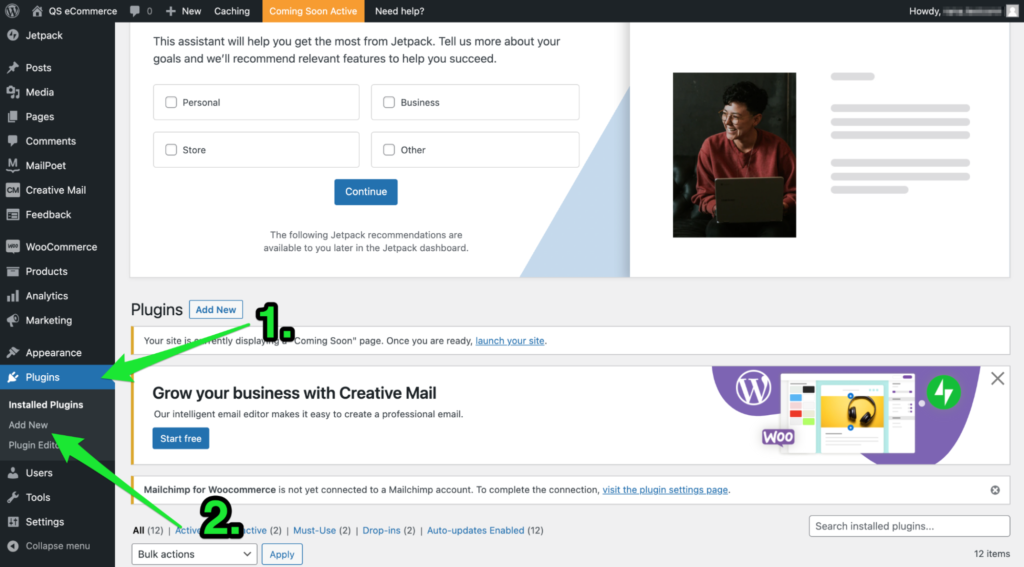
- Enter the identify of the plugin you need to set up within the search bar and press Enter.

- Click on on the Set up Now or Activate button so as to add the plugin to your web site.
WooCommerce’s setup wizard will then take over from right here, guiding you thru the remainder of the setup course of.
Add Mandatory Content material
With the plugins sorted, your subsequent focus ought to be on including related copy and content material to your ecommerce web site. This consists of the next:
- UX copy or Microcopy (CTAs, error messages, navigational copy). Each single phrase issues right here, so we advocate taking your time and writing with care. For example, “Purchase Now” can sound too pushy if it’s early within the shopping for stage. One thing extra refined like “Study Extra” is likely to be higher. It will depend on your targets and the place the shopper is within the buying course of.
- Product Descriptions. As talked about, you need to take the initiative and write Web optimization-optimized product descriptions. However along with that, you also needs to construction it appropriately and guarantee it’s descriptive. We extremely advocate utilizing bullet factors to separate technical info from the prose.
- About Us. Particularly as a brand new web site, clients will need to know extra about you and the corporate. Nice about us web page copy tells the story of you and what you are promoting, together with your imaginative and prescient. Prospects take pleasure in figuring out extra in regards to the individuals behind a model.
- Contact Web page. You completely want a contact web page the place any buyer can attain out with questions or in the event that they want assist. It may be quite simple with fields for a reputation, e mail handle, and message. You may simply discover free contact web page plugins or create your individual.
Relying on the complexity of your product choice, you might need to add a number of different content material pages. For instance, if you want to emphasise that you simply supply returns or a money-back assure in your merchandise, having a web page that explains the foundations for this stuff is a good suggestion.
For websites with numerous merchandise, you might need to kind them into classes. The class web page offers you the prospect to elucidate the background on the merchandise in just a little extra element than a easy product description. In case your product classes have some distinctive features to them, a class web page is an effective place to spotlight these features.
Step 7: Make Your Ecommerce Web site Public
Are you pleased with the way in which your web site seems, works, and feels? Then it’s time to make it public and begin promoting!
Launch Your Web site
Go to Settings from the WordPress sidebar, and click on on Privateness.
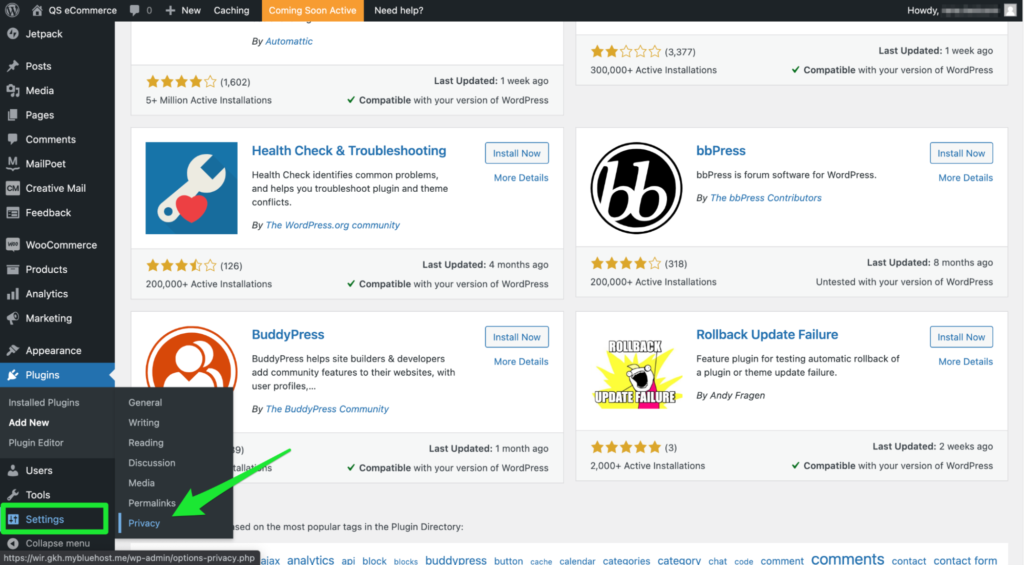
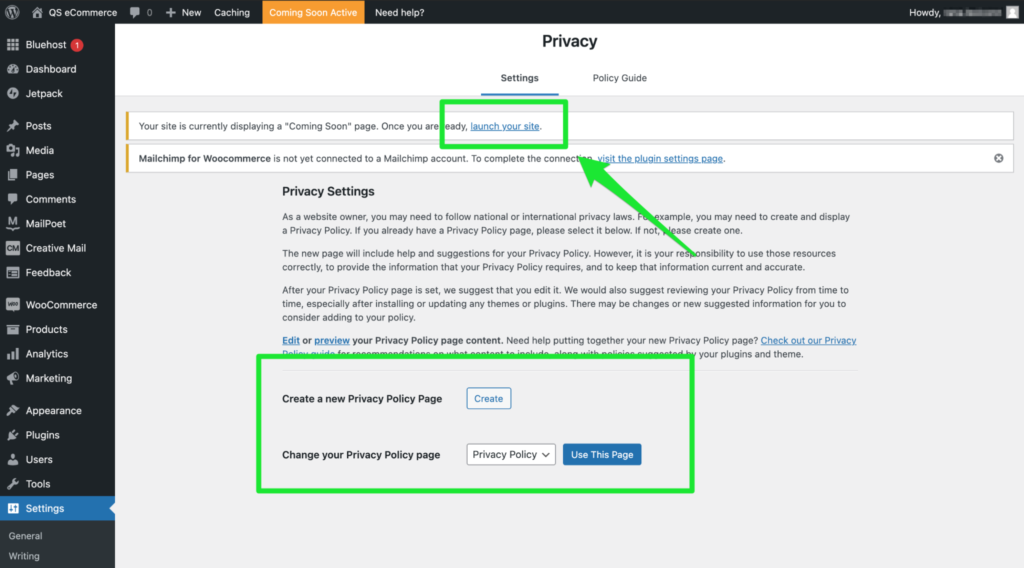
The very first thing is to kind out your privateness settings. A privateness coverage is a vital facet of each web site—ecommerce or not. In reality, WordPress gained’t allow you to go public except you select a privateness coverage web page. Fortunately, there’s already a template in place, however you can even edit it or write up your individual.
Lastly, be certain all of your web site’s must-haves—homepage, contact web page, about web page, and some other content material—are all set and look the way in which you need.
Lastly, click on Launch Your Web site.
Congratulations! You have got your ecommerce web site up and operating!
Monitor and Replace
Your obligations aren’t over when the web site is revealed. Operating a profitable ecommerce retailer requires fixed monitoring, particularly within the early levels.
Whereas your web site won’t ever be good, you need to take each potential step to optimize your web site for conversions.
Take note of key analytics like bounce charges, purchasing cart abandonment, web page loading time, common order worth, conversions, and extra. It will enable you to decide which pages or merchandise in your web site want bettering.
For instance, you may uncover that your web site has a extremely excessive add-to-cart charge, however that 70% of these guests are abandoning their carts when prompted to decide on a delivery possibility. Such a info is extraordinarily precious and will immediate you to supply free delivery or further delivery choices.
You may as well experiment with completely different design and navigation components in your ecommerce web site. Delicate adjustments can considerably enhance the consumer expertise and result in extra conversions and income.
When your web site first goes reside, you need to confirm that every little thing works as supposed. Generally new ecommerce retailers have damaged buttons, photos that don’t load, or invalid product pages. Figuring out these as quickly as potential will present a smoother purchasing expertise to your clients and enhance the way in which your web site is ranked for Web optimization elements.


